Starting Another Activity
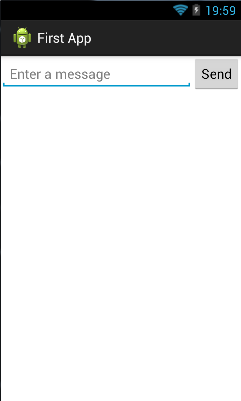
 前回作成したSendボタンにイベントを設置し、別のActivityに情報設定して表示させるという事を行います。
android:onClick="sendMessage“という属性をButtonエレメントに追加します。
Android Systemはactivity内の同名の関数をfunction(View view);という形式でコールします。
取りあえずイベント駆動を試したいという事で、トレーニングにはありませんがToastの通知表示を組み込んでいます。実は筆者はToastという機構に触れたのはWindows8が最初でしたが、なるほど、これの真似だったのだなと…。
<?xml version="1.0" encoding="utf-8"?>
<LinearLayout xmlns:android="http://schemas.android.com/apk/res/android"
    xmlns:tools="http://schemas.android.com/tools"
    android:layout_width="match_parent"
    android:layout_height="match_parent"
    android:orientation="horizontal" >
    <EditText
        android:id="@+id/edit_message"
        android:layout_weight="1"
        android:layout_width="0dp"
        android:layout_height="wrap_content"
        android:hint="@string/edit_message" />
    <Button
        android:layout_width="wrap_content"
        android:layout_height="wrap_content"
        android:text="@string/button_send"
        android:onClick="sendMessage" />
</LinearLayout>
package com.planetleaf.lab.firstapp;

import android.app.Activity;
import android.os.Bundle;
import android.view.Menu;
import android.view.View;
import android.widget.Toast;

public class MainActivity extends Activity {

	@Override
	protected void onCreate(Bundle savedInstanceState) {
		super.onCreate(savedInstanceState);
		setContentView(R.layout.activity_main);
	}

	@Override
	public boolean onCreateOptionsMenu(Menu menu) {
		// Inflate the menu; this adds items to the action bar if it is present.
		getMenuInflater().inflate(R.menu.main, menu);
		return true;
	}
	/** Called when the user clicks the */
	public void sendMessage(View view) {
		// Do something in response to button
		Toast.makeText(this, "send message", Toast.LENGTH_LONG).show();
	}
}
TipsとしてEclipseのエディタ上でCtrl+Shit+"O"を押すと、不足しているimportを補完してくれる機能が挙げられています。
次にActivity間のやり取りなど、コンポーネントの接続を担うIntentを作成します。
動作が確認できたためToastはコメントアウトしました。
package com.planetleaf.lab.firstapp;

import android.app.Activity;
import android.content.Intent;
import android.os.Bundle;
import android.view.Menu;
import android.view.View;
import android.widget.EditText;

public class MainActivity extends Activity {
	public final static String EXTRA_MESSAGE = "com.planetleaf.lab.firstapp.MESSAGE";
	@Override
	protected void onCreate(Bundle savedInstanceState) {
		super.onCreate(savedInstanceState);
		setContentView(R.layout.activity_main);
	}

	@Override
	public boolean onCreateOptionsMenu(Menu menu) {
		// Inflate the menu; this adds items to the action bar if it is present.
		getMenuInflater().inflate(R.menu.main, menu);
		return true;
	}
	/** Called when the user clicks the */
	public void sendMessage(View view) {
		// Do something in response to button
		//Toast.makeText(this, "send message", Toast.LENGTH_LONG).show();

		Intent intent = new Intent(this, DisplayMessageActivity.class);
		EditText editText = (EditText) findViewById(R.id.edit_message);
		String message = editText.getText().toString();
		intent.putExtra(EXTRA_MESSAGE, message);
		startActivity(intent);
	}
}
new Intent(this, DisplayMessageActivity.class);でIntentオブジェクトを作成していますが、この段階ではDisplayMessageActiviyを作成していないので、エディタ上ではエラーが出ています。
受け渡しを行うためのEXTRA_MESSAGEというStatic変数を追加して、findViewByIDで自動生成されたエレメントIDからオブジェクトを取得、後にgetText()で文字列を取得しています。intent.putExtra(EXTRA_MESSAGE, message);でStatic変数へ文字列をセットし、startActivity(intent);でIntentに設定されているActivityが起動します。
我ながら思考回路が低下しているというか、考える能力が欠如しているというか…、putExtraの第一引数はそもそもデータキーであり、intent自体は動的に生成されたデータであって、その中のデータコンテナでデータのやり取りができると、それだけのお話。
……、病むに任せてしまったとは言え脳の退化具合が酷過ぎる。
仕組みは出来上がったので、次は起動するActivityの作成です。
IDEのtoolberのnewボタンからウィザードを起動して、Androidフォルダ内から必要に応じて作成するコンポーネントを選びます。
あとはプロジェクト作成時と同じ要領でActivityの設定が始まり、Activity Nameを変更、Hierarchical Parentで親Activityを指定して完了します。
このウィザードで以下が自動生成されます。
res/menu/display_message.xml
res/layout/activity_display_message.xml
DisplayMessageActivity.java
DisplayMessageActivity.javaは既に最低限のActivityとして機能させるためのコードが埋め込まれています。トレーニングの記事上にはAPI-Level 11で追加されたActionBar APIのonHONYCOMBに関する処理をプラットフォームバージョンで判定し、lint errorsを回避するために@SuppressLint(“NewApi")を追加せよと有ります。どういう事が起こるのかと調べてみるとこういう事のようです。昔のSDKは知りませんが現行のSDK version 22.0.5では該当コードは既にインプリメントされています。
リソースを弄ってActivityのタイトルを変更などは説明するまでも無いので割愛します。
Activityを使用するにはManifestへの記述が必要なんて事を何処かの読み物で読んだ気がしますが、ADTが勝手に追加したようでなかなかお手軽でした。
        <activity
            android:name="com.planetleaf.lab.firstapp.DisplayMessageActivity"
            android:label="@string/title_activity_display_message"
            android:parentActivityName="com.planetleaf.lab.firstapp.MainActivity" >
            <meta-data
                android:name="android.support.PARENT_ACTIVITY"
                android:value="com.planetleaf.lab.firstapp.MainActivity" />
        </activity>
meta-dataが追加されていますが、parentActivityNameによるAPI-Level 16以降でのナビゲーションの実装を下位APIでもサポートライブラリにより実現させるための情報だそうです。
今回の趣向であるActivityへのデータ受け渡しのコードは以下の通り
	@Override
	protected void onCreate(Bundle savedInstanceState) {
		super.onCreate(savedInstanceState);

	    // Get the message from the intent
	    Intent intent = getIntent();
	    String message = intent.getStringExtra(MainActivity.EXTRA_MESSAGE);

	    // Create the text view
	    TextView textView = new TextView(this);
	    textView.setTextSize(40);
	    textView.setText(message);

	    // Set the text view as the activity layout
	    setContentView(textView);
	//	setContentView(R.layout.activity_display_message);
		// Show the Up button in the action bar.
		setupActionBar();
	}
Intent intent = getIntent();でIntentを取得して、
String message = intent.getStringExtra(MainActivity.EXTRA_MESSAGE);でintentのデータコンテナから文字列を取得。Viewを作成してセットして終わりです。


ディスカッション
コメント一覧
まだ、コメントがありません